Configure Azure Cloud Security Posture Management (CSPM)
Estimated Time to Complete: 10 minutes
Contact us to learn more about adding Managed Detection & Response (MDR) services to your Azure endpoints
To enable the ActZero team to monitor your Azure environment, you need to complete a few steps to configure a connection from your cloud environment to ActZero. Use the instructions below to set up an Azure App Registration with the necessary read-only permissions.
Overview
There are two methods to prepare the Azure subscription to be scanned for CSPM:
Whichever method you choose, the user must be a Global Administrator, or at least have sufficient permissions to create an App Registration, Secret and assign API & RBAC permissions to the application and Subscription.
Once completed, you will need to encrypt the copied values into Keybase and send them via email.
Manual Method
You can manually create the App Registration, a corresponding Secret value, and add the API & RBAC permissions through the Azure Portal. To do so, perform the following steps:
Create an App Registration
- Sign into the Azure portal.
- Locate and open App Registrations.
- In the App Registrations page, click on New Registration.
-
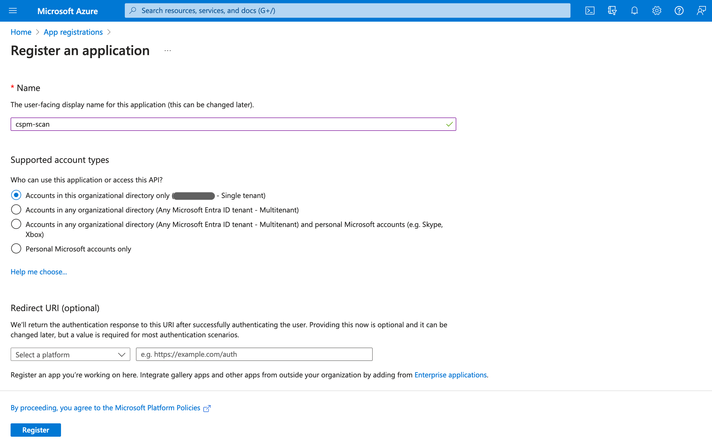
Create the App Registration:
- Give the App a name (i.e. cspm-scan).
- Select Accounts in this organization directory only.
- Leave URI(optional) field unchanged.
- Click Register.
-
Copy the following information from the App Registration you just created:
- Application (client) ID.
- Directory (tenant) ID.

Create App Registration Secret
- For the Application you just created, click on Certificates and Secrets on the left-hand side.
- Click on New Client Secret.
- Enter a description for the Client Secret (i.e. cspm-scan-secret).
- Selecte the maximum expiration time: 730 Days.

- Click Add.
- From the resulting Secret copy the contents of the Value column.

Add Permissions
Add the following Microsoft Graph permissions to the App Registration:
Directory.Read.AllPolicy.Read.All
To add the permissions, perform the following:
- For the Application you just created, click on API Permissions on the left-hand side.
- Click on Add a Permission.
- Click on Microsoft Graph.
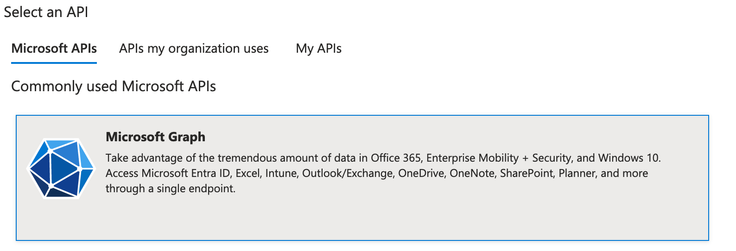
- Click on Application Permissions.
- Perform a search for Directory and select
Directory.Read.All.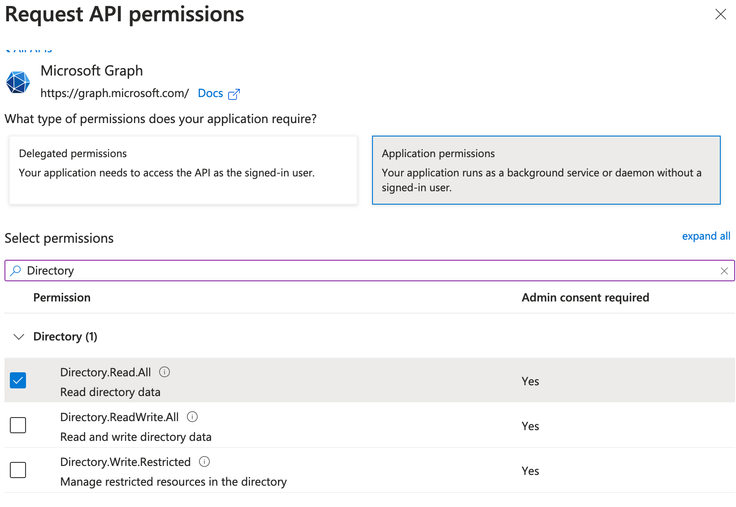
- Perform a search for Policy and select
Policy.Read.All. - Click on Add Permissions at the bottom of the page.
Add Consent
You should now see the permissions you added, however it may be necessary to give Admin Consent.
To do so, perform the following steps:
- Click on Grant admin consent for
<Directory Name>.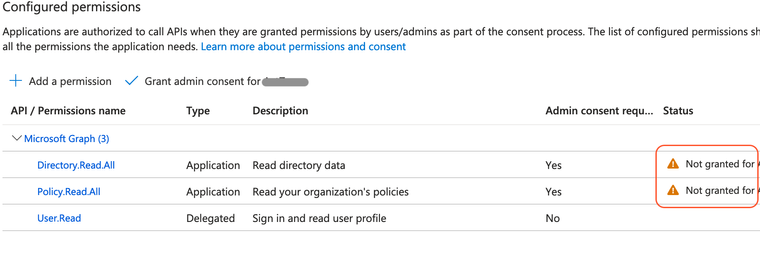
- Select Yes on the pop-up.
- You should now see a green checkmark under the Status column.

Add Role Assignments
You will need to assign RBAC roles in the subscription. To do so:
- Open the Subscriptions page (you can use the search bar at the top to find it).
- Click on the corresponding Subscription to open its properties.
- Open Access Control(IAM) on the left-hand side.
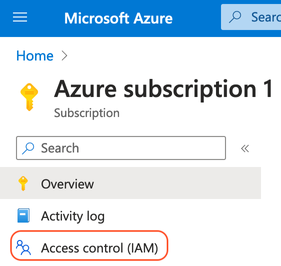
- Click on +Add and select Add role assignment from the dropdown.
Add Security Reader Role
- Search for Security Reader role and select it from the list.
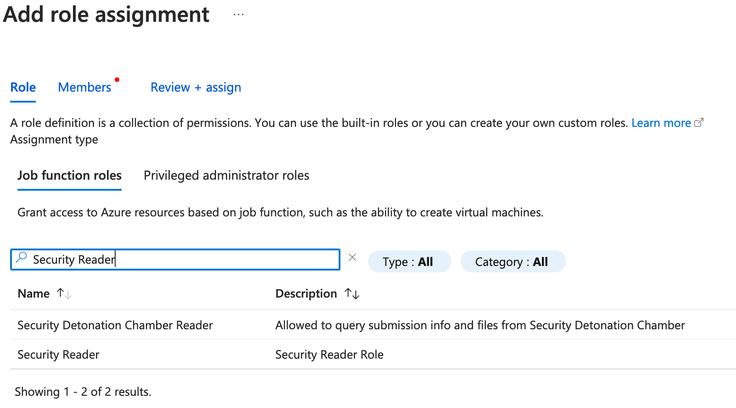
- Click Next.
- Under the Members tab, ensure the radio button has User, group or service principal selected.
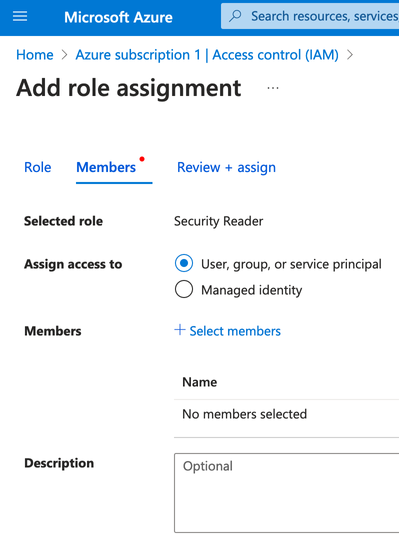
- Click on Select Members.
- Search for the registered application name (i.e. cspm-scan) on the right-hand side.
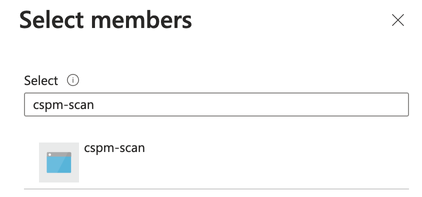
- Select the Registered App.
- Click on the Select button at the bottom.
- You should now see the cspm-scan application listed under Members.
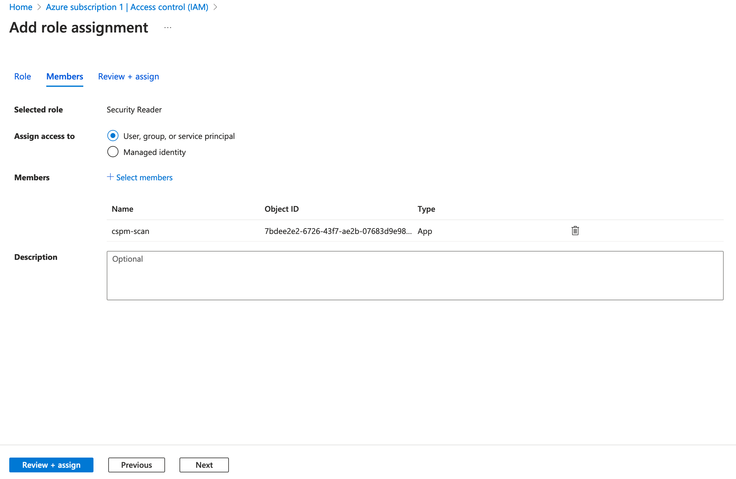
- Click on Next.
- Review the changes and click on Review + assign.
Add Reader Role
To add the Reader role, repeat the same steps performed for adding the Security Reader role. To find the role, perform a search for Reader under the Job function roles.
Encrypt the values
Encrypt the cspm-scan-secret,Application ID, and Directory ID values that you copied and send them to ActZero. Follow the steps listed here
PowerShell Script
The PowerShell script will perform the following tasks:
- Install the AzureAD.Standard and Microsoft.Graph packages as needed.
- Check the tenants present. If multiple tenants are found, you can select which tenant you would like to set up the registration for.
- Create an App Registration and Secret Value under the subscription for the Azure tenant
- Add the necessary API permissions and RBAC roles.
To run the PowerShell script, perform the following steps:
- Download the
azureappregistration.ps1script from here. - Log into your Azure portal.
- Open the Azure Cloud Shell, and select PowerShell.
- If prompted, create an Azure file share.
- Upload the azureappregistration.ps1 script to Azure PowerShell.
- Run the script by typing
./azureappregistration.ps1 - The script requires authentication through a web browser, necessitating a device login at https://microsoft.com/devicelogin. Enter the code provided by the script to authenticate the Microsoft Graph Command Line Tools.

- The script will output the values needed by ActZero to scan the Azure Subscription. Copy these values.

- Encrypt the values in Keybase (See instructions below)
Encrypt Values using Keybase
To securely encrypt the values (Tenand ID, Client ID and Client Secret), you will use Keybase. For this, you DO NOT need to create a Keybase account.
Follow these steps:
- Open Keybase
- For Recipient use:
actzerocre - For Message to Encrypt, paste the values (copied from the previous steps) in the following format:
Client Secret: <cspm-scan-secret Value> Client ID: <Application ID> Tenant ID: <Directory ID> - Click on the Encrypt Button
- Copy the encrypted contents of the message, and send them via email.
- Erase the copies of the sensitive information in your local environment.